Empyrrean's Final Stand Walkthrough
This is the last mission of the Core campaign. On Medium you start in a forest in the south with a Commander, The Can, two Pyros and two Thuds. Arm has 102 units on the ridge and the hills to the north, and its own Commander stands among them. The mission lists two goals: destroy every Arm unit, and destroy the Arm Commander.
Most of Arm's army does not move. Its Spiders, Merls, Lugers and Bulldogs wait until they are attacked, and its Guardians, Sentinels and Big Bertha are buildings. What moves are a few patrols, guards that gather round the Arm Commander, and Phoenix bomber raids at 31:40 and 40:00. Build up in the forest, break the line at the foot of the ridge with Punishers from beyond its reach, use an Intimidator on the Big Bertha and the Guardians, and then climb.
The Battlefield
The southern two thirds of the map is a flat forest, with eleven of the thirteen metal deposits and both geothermal vents. A ridge crosses the map from edge to edge. Its sides are steep, but in the middle a broad slope leads up to the plateau. Arm's front line stands at the foot of the ridge. Its Guardians, Sentinels, Merls and Defenders hold the plateau, and a high hill at the top of the map holds the Big Bertha, more Spiders and Arm's aircraft.
The numbers on the map are the plan; the letters are Arm's positions. The units shown are those of Medium, and hovering over a dot shows its orders.
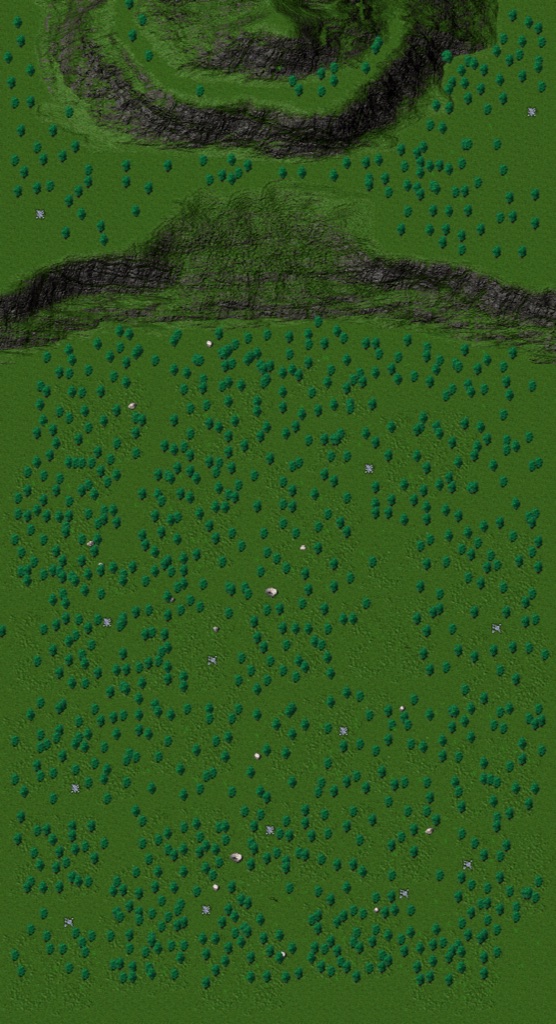
2 geothermal vents
- 1Your Commander. A deposit worth 223 lies right beside it, at (1352, 4152).
- 2A geothermal vent, 425 pixels south of your start.
- 3The Intimidator, ringed with Pulverizers. From here its range of 5120 covers the whole of Arm's half of the map.
- 4A second geothermal vent, closer to the front.
- 5The Punisher line. The Arm Commander is 1161 pixels away, inside the Punisher's range of 1200, and nothing in Arm's front line reaches back this far.
- 6The central slope, your way up to the plateau once its guns are gone.
- AThe Arm Commander, guarded by an Eraser and two Samsons. When he is attacked, he walks north to B.
- BThe hilltop that the Arm Commander walks to.
- CEight Lugers and five Bulldogs along the foot of the ridge. Most of them wait until they are attacked.
- DSix Fidos. From 3:20 they patrol west across the whole map and back, between z 1880 and 2180.
- EA Guardian on the western edge of the plateau, with three Merls beside it.
- FA Guardian on the eastern edge of the plateau, with three more Merls near it.
- GThe Big Bertha. It is set to hold its fire, but its range of 4096 covers your start.
- HThe Fusion Reactor.
- ISix Phoenix bombers that leave at 40:00, and five Hawks. The Hawks wake when the Phoenix at (2400, 128) is attacked.
Arm's Timetable
These are the moves that matter on Medium, counted from the start of the mission.
| Time | What happens |
|---|---|
| From the start | Three Brawlers patrol from the west edge, near (80 to 208, 1712 to 2000), east to (2637, 1859 to 1939). |
| 3:20 | The six Fidos at D start a patrol west to the west edge. A Construction KBot follows the same line. |
| 5:00 | A second Construction KBot starts a patrol across the plateau, from (2480, 1200) to (233, 1133). |
| 6:40 | Four Samsons start a patrol from the west edge, near (190, 2140), east to (2544, 2337 to 2537). |
| 10:00 | Two Brawlers from the north-west corner fly to guard the Arm Commander. |
| 15:00 | An Adv. Construction Kbot starts a patrol along the north of the plateau, from (384, 848) to (2426, 815). |
| 20:00 | Four Zeus walk down from the plateau to guard the Arm Commander. |
| 31:40 | Three Phoenix bombers from the north-west corner attack The Can, then your Adv. Construction Vehicles, Adv. Aircraft Plants, Goliaths, Intimidators, Mobile Artillery and Advanced Radar Towers. |
| 40:00 | Six Phoenix bombers from the north-east attack your Reapers, Diplomats, Slashers, Fusion Power Plants, Geothermal Powerplants, Punishers, Intimidators, Doomsday Machines, Mobile Artillery, Solar Collectors and Moho Mines. Two of them start further down that list. |
| When the Arm Commander is attacked | He walks north to B. Two Brawlers from the north-west corner attack your Commander. |
| When the Phoenix at (2400, 128) is attacked | Five Hawks attack your Avengers, Rapiers, Vamps, Pulverizers, Slashers, Hurricanes, Solar Collectors and Metal Extractors, in that order. One of them waits 2:00 first. |
| Until attacked | The 14 Spiders, 6 Merls, 7 of the Lugers and 4 of the Bulldogs stay where they are until they are attacked. They have no orders after that. |
The Plan on Medium
Build in the Forest (0:00 to 15:00)
- Put a Metal Extractor on the deposit beside the Commander at 1, then on the others in the forest. The ground holds metal everywhere here, so an extractor makes some even off a deposit.
- Build a Kbot Lab and Construction Kbots. Put Geothermal Powerplants on the vents at 2 and 4, for 250 energy each, and add Wind Generators: the wind runs from 900 to 3500. Reclaim trees for more energy.
- Leave The Can, the Pyros and the Thuds where they start, around (1400 to 1730, 3420 to 3570). The patrols north of them pass about 1000 pixels away or more.
- Build an Adv. Kbot Lab and an Adv. Vehicle Plant. An Adv. Construction Kbot can then build a Fusion Power Plant, which makes 1050 energy.
Break the Line (15:00 to 31:00)
- Build six or more Punishers at 5. A Luger reaches 620, a Fido 480 and a Bulldog 320, and the Merls stand far back on the plateau, so nothing in the line can answer them. Both Guardians are more than 1700 away.
- Send a Fink to watch A. The Eraser beside the Arm Commander jams radar within 500, so you need a unit that can see him.
- Fire on the Arm Commander first, while he stands still. Each Punisher shell does 320 damage, so two volleys from six Punishers (3840) are more than his 3000 hit points. If he survives, he walks north to B, and the Intimidator can finish him there later.
- An attack on him also sends two Brawlers for your Commander. Keep Pulverizers around him: a Pulverizer missile does 95 damage to a Brawler, which has 920 hit points.
- Then grind down the line from 5. A Luger has 525 hit points (2 shells), a Fido 1000 (4 shells) and a Bulldog 2102 (7 shells). Hit the Fidos each time their patrol brings them past.
The Intimidator and the Raids (from about 25:00)
- Build the Intimidator at 3, with Pulverizers around it. Its first target is the Big Bertha at G: one shell of 2400 damage destroys it (1800 hit points). Then take the Guardians at E, F and (1536, 576), two shells each, and the Fusion Reactor at H, also two shells.
- Before 31:40, park The Can at 3 under the Pulverizers. It is the first target of the three Phoenix bombers, and each Pulverizer missile does 95 damage to a Phoenix (470 hit points). Their next targets include Goliaths and the Intimidator.
- Before 40:00, add more Pulverizers around the Punishers and the Intimidator. Firing on the Phoenix from (2400, 128) wakes five Hawks, and if you have no Avengers, Rapiers or Vamps, they go for your Pulverizers first. Build enough that the Hawks die before the Pulverizers do.
Take the Plateau and the Hill
- With the Guardians and Sentinels gone, move the Punishers forward and climb the slope at 6. Lead with Goliaths (2845 hit points, range 400) and Reapers, with Slashers for cover: a Slasher missile does 92 damage to a Phoenix, a Hawk or a Brawler.
- Kill the Spiders at range. A Spider's Paralyzer reaches only 220, and the Goliath's cannon reaches 400. Use the Punishers or Diplomats (range 800) on the Merls, whose rockets also reach 800.
- Clear the north hill: nine Spiders, the Guardian at (1536, 576), and the Arm Commander at B if he is still alive. Then sweep the rest: the Solar Collectors, Moho Mines and Energy Storage, the Air Repair Pad at (2608, 960), both factories, every construction unit and the aircraft still parked along the north edge.
What Changes on Hard
- You start with the Commander, The Can, one Pyro and one Thud. The Commander starts beside the others at (1568, 3408), about 700 pixels further north than on Medium.
- The first Phoenix raid comes at 20:50, not 31:40. Five bombers go for your factories first, then your Punishers, Geothermal Powerplants, Pulverizers, Reapers, Cans and Commander. Two Brawlers come at the same time for your Pulverizers, Reapers, Cans and Diplomats.
- The second raid comes at 41:40: five Phoenix bombers for your power plants, extractors, Slashers, Diplomats, radar towers and construction units, then your Commander. Seven Hawks wake when the one from (2320, 112) is attacked.
- An Annihilator stands on the hill at (1312, 544), with a range of 1200. One Intimidator shell destroys it (1410 hit points).
- There are two Big Berthas, at (320, 912) and (2240, 768), and a fourth Guardian at (1088, 544). The Fusion Reactor stands at (160, 480) instead.
- There are 12 Brawlers. Four patrol the line: two from the start, one from 10:00 and one from 11:40. Three, not two, attack your Commander when the Arm Commander is attacked.
- Six Zeus guard the Arm Commander: four from 20:00 and two more from 30:00.
- There are 9 Lugers and 7 Bulldogs, and several of them have only a 4:00 timer instead of waiting to be attacked.
- Starting resources stay at 1000 metal and 1000 energy for each side. Arm keeps all the income from its Fusion Reactor, Moho Mines and Solar Collectors, against 70 percent on Medium.
Which Units Beat Theirs
| Arm unit | Its threat | Your answer |
|---|---|---|
| Commander | 3000 hit points. Its death blast does up to 9999 damage within 475 | Six or more Punishers from 1100 or further |
| Luger | Plasma cannon, 130 damage, range 620 | Punisher (range 1200), 2 shells |
| Bulldog | 2102 hit points, plasma cannon with range 320 | Punishers, then Goliaths (range 400) |
| Fido | Gauss cannon, 120 damage, range 480 | Punishers as the patrol passes |
| Merl | Rocket, 500 damage, range 800 | Punishers, or Diplomats at equal range |
| Spider | Paralyzer, range 220. It stops units without damaging them | Goliaths and Punishers, before it gets close |
| Guardian | Plasma cannon, 360 damage, range 1250 | Intimidator, 2 shells |
| Big Bertha | 2000 damage, range 4096 | Intimidator, 1 shell |
| Phoenix | Bomber, 470 hit points | Pulverizer (95 damage), Slasher (92) |
| Hawk | Fighter that hunts your anti-air. 510 hit points | Many Pulverizers. It takes 6 missiles to bring one down |
Metal and Energy
The ground itself holds metal here, with a surface value of 128, so a Metal Extractor makes some metal anywhere. The 13 deposits make more. In the forest, (1352, 4152), (1032, 4552), (1720, 3656), (376, 3944) and (536, 3112) are worth 223, and (1064, 3304), (2488, 3144), (2344, 4328), (2024, 4472) and (344, 4616) are worth 187. One more worth 223, at (1848, 2344), lies under the Samson patrol, and the last two are under Arm's Moho Mines on the plateau.
Fifteen rocks hold about 1150 metal for reclaiming, all but one of them in the forest south of Arm's line. The trees give energy when reclaimed, and the forest is thick with them.
There is no tidal power. The wind runs from 900 to 3500, and the two vents at 2 and 4 give a Geothermal Powerplant 250 energy each. Plan for at least one Fusion Power Plant: the Intimidator costs 62,520 energy to build and 2000 for every shot.
Traps
- The Arm Commander dies in a blast of up to 9999 damage within 475 pixels. Your Disintegrator reaches only 240, so using it on him puts your own Commander inside that blast, and losing your Commander loses the mission.
- Any attack on the Arm Commander sends two Brawlers for yours.
- Firing on the Phoenix from (2400, 128) wakes five Hawks, and their targets are your anti-air.
- The Big Bertha is set to hold its fire, but the rest of its order is in a form the guide cannot read. It reaches your start from 3560 pixels, so destroy it as soon as the Intimidator is ready.
- The Big Bertha and the Fusion Reactor die in atomic blasts of up to 2000 damage within 258 pixels.
- Each Spider, Merl, Luger and Bulldog that waits wakes only when it is hit itself. Fight them from beyond their reach and they cannot hit back.
- The mission needs every Arm unit destroyed, including aircraft parked at the north edge and construction units on patrol.